Recording From Your Digital Console: DiGiCo and MADI- Pt. 2 Configuring the Computer
 First Thing's First
I'm going to be bold here and hope you already have a basic understanding on how your computer works. We'll assume that you've already installed Pro Tools. I'm writing this while walking through the process on a 2010 model 13" MacBook Pro. It's running OS X 10.7.5 (Lion), and Pro Tools 10.
On a side note, I usually run my Apple computers one generation behind on the operating system. The reason for this, is that there can be a lot of heartache when you're running things on the bleeding edge of technology. I prefer to let someone else find all the bugs. I actually upgraded this machine from Snow Leopard to Lion shortly after Mountain Lion came out. One huge reason for that is that Pro Tools wasn't supporting Mountain Lion at the time.
I am also not planning on upgrading to Pro Tools 11 any time soon. There's a lot of issues with plug in compatibility and things like that. If you want to read more about that then check it out at Avid's website here: Pro Tools 11 FAQ
What's Next?
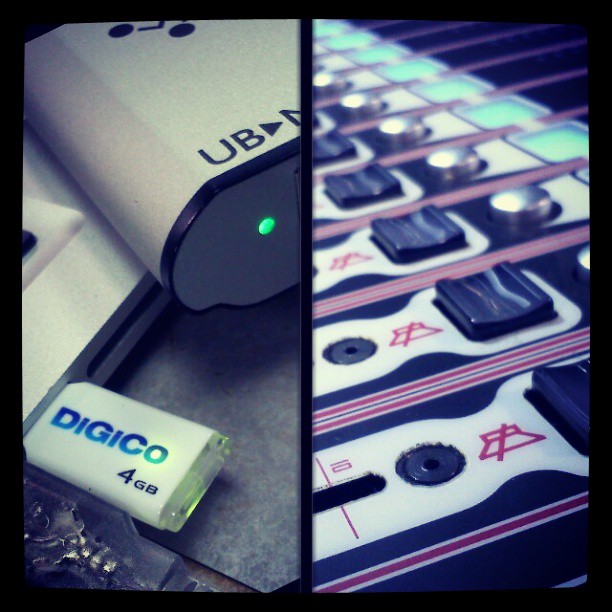
First we need to unpack the UB MADI and install the drivers. The drivers are on a USB flash drive that's in the packaging under the UB MADI. Insert the flash drive, and open it up. Double click on the "Install DiGiCo UB MADI on Macintosh.pkg" file and the installer should start. Then just walk through the process. Then we'll need to set up the I/O in Pro Tools.
To do this, we'll start a new session. Start Pro Tools. I still have the start-up screen on my particular set up, so I'll select create blanks session. For audio file I'm choosing to run 24 bit, 96 kHz broadcast wave files (bwf.)
* Note that the UB MADI will set itself to whatever the audio input sample and bit rate is. If your DigiCo console is running 24 bit 48 kHz then you'll need to set your Pro Tools session accordingly or things won't play nicely together.
Once Pro Tools opens up, we need to change the playback engine. Click on "Setup", select "Playback Engine," go to the drop down menu and select "Pro Tools Aggregate I/O." A warning should pop up stating that "Selecting this playback engine will automatically save and close your session....". We are pretty sure we want to proceed so just click "Yes."
The session should restart. After things come back online we can set up our "Pro Tools Aggregate I/O." That will be a post unto itself. Right now my plan is to touch on setting up a Yamaha console with a Dante network