Recording From Your Digital Console: Yamaha and Dante- Pt. 1 Configuring the Console

http://www.flickr.com/photos/gabitobalderas/6385082857/

Link to Gabriel's photo stream

The Rig

Now it's time to figure out how to do all of this with a Yamaha digital console, and a Dante network.

The computer of choice will be a 2010 model 13" MacBook Pro running OS X 10.7.5 "Lion." All of the Audio will be pumped into Pro Tools 10.

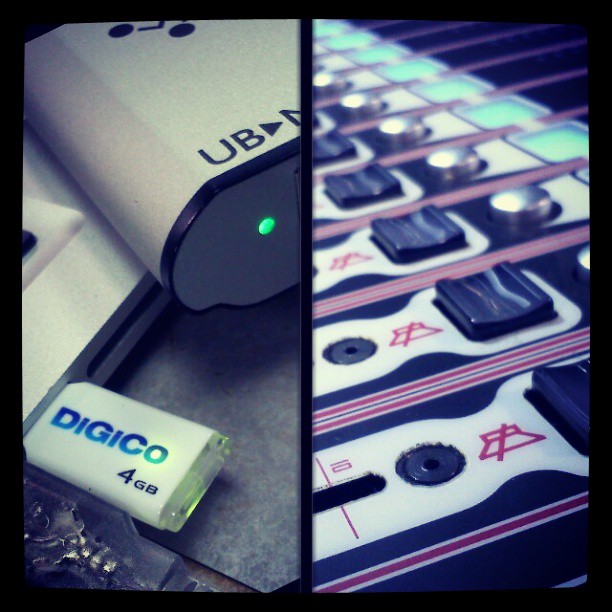
Our console today will be a Yamaha LS9-32 with two Dante MY 16-AUD Dante Network Cards. These are 16 channel network audio cards. They'll allow us to send 32 audio channels to our computer via CAT5 cable.  We're also going to need a Gigabit Ethernet switch. This will allow us to connect the two Dante cards to the audio network, then use Dante Virtual Soundcard on our computer. We wouldn't have to do quite as much work if we were using one of the newer CL series consoles with a Rio stagebox.

There's a few things to note here-

  1. I'm not going to go into every single detail- for eample installing the cards into the console is pretty easy. The guides on the Yamaha website cover that. I just want to touch a few things that might get missed along the way.
  2. This process might work on the first try for you. Or it might not.  I've had clients that haven't had any issues with a Dante set up. Then I've seen Dante networks collapse after the gigabit switch is power cycled- meaning they work one day, and they don't the other.
  3. You can probably tell by my last two notes that I'm not a huge fan of this setup.

Helpful Links

Here's a few helpful links for more information before you get started.  The first is from Yamaha and contains a few user and setup guides. You'll need to click on the tab titled "self-training." Read through these a few times. They're pretty helpful.

Yamaha / Dante MY 16-AUD Dante Network Cards

You're also going to want to make sure you have the latest software  and firmware updates:

Firmware, Software & Drivers

And you'll need a gigabit switch. As far as I know the Dante networks are a little particular about what hardware you use. There are some guides in the links below to choosing a switch.

Gigabit Switches For CL Series Consoles 

Selecting Network Switches

Getting Started

Installing the Dante cards is covered on page 12 of the current guide, available from the first link above. You'll need to do that, but in short they pretty much just plug into the back of the console.

So, once the cards are installed you'll need to decide what your clock source is. There is a lot of detail about that on pages 28-33 of the Dante-MY16-AUD User Guide.

Then you'll need to configure your direct outs. To do that you'll go to the patch editor on the console. Select the Direct Out patch tab. Then set Input Chanel 1 to Slot 1 Output 1. Set Input Channel 2 to Slot 1 Output 2, and so on.  When you get to Input 17, just set it to Slot 2 Output 1. In short Channels 1-16 Direct Outs get routed through Slot 1 Outs 1-16. 17 -32 get routed to Slot 2 Outs 1-16.

Last Step- this is really important.  SAVE YOUR SCENE. You may also want to consider "safe-ing" your patching. This prevents the output patching from being altered with scene recalls. For all the technical stuff you can stop reading here.

An Apology for the Delay

Now I need to apologize for taking so long to write this part of the series! I think it was October 2013 since my last post. I have to be honest- after I started I got rather bored with it. Having to work out all the computer details and things like that isn't that fun. I'd rather be mixing. Setting up a Dante network can be a bit involved, and sometimes the Dante cards on-board the consoles just don't want to act quite right.  That being said- Yamaha/Audinate have released several updates since I started writing this series that address quite a few problems. It's also noteworthy that the newer Yamaha hardware that are running Dante natively such as the new CL series consoles (CL1,3,5 etc) seem to work extremely well, as far as I know.

Recording From Your Digital Console: DiGiCo and MADI- Pt. 2 Configuring the Computer

ConfigureComputer First Thing's First

I'm going to be bold here and hope you already have a basic understanding on how your computer works.  We'll assume that you've already installed Pro Tools.  I'm writing this while walking through the process on a 2010 model 13" MacBook Pro. It's running OS X 10.7.5 (Lion), and Pro Tools 10.

On a side note, I usually run my Apple computers one generation behind on the operating system. The reason for this, is that there can be a lot of heartache when you're running things on the bleeding edge of technology. I prefer to let someone else find all the bugs. I actually upgraded this machine from Snow Leopard to Lion shortly after Mountain Lion came out.  One huge reason for that is that Pro Tools wasn't supporting Mountain Lion at the time.

I am also not planning on upgrading to Pro Tools 11 any time soon. There's a lot of issues with plug in compatibility and things like that. If you want to read more about that then check it out at Avid's website here: Pro Tools 11 FAQ

What's Next?

First we need to unpack the UB MADI and install the drivers. The drivers are on a USB flash drive that's in the packaging under the UB MADI. Insert the flash drive, and open it up. Double click on the "Install DiGiCo UB MADI on Macintosh.pkg" file and the installer should start. Then just walk through the process. Then we'll need to set up the I/O in Pro Tools.

To do this, we'll start a new session. Start Pro Tools. I still have the start-up screen on my particular set up, so I'll select create blanks session. For audio file I'm choosing to run 24 bit, 96 kHz broadcast wave files (bwf.)

* Note that the UB MADI will set itself to whatever the audio input sample and bit rate is. If your DigiCo console is running 24 bit 48 kHz then you'll need to set your Pro Tools session accordingly or things won't play nicely together.

Once Pro Tools opens up, we need to change the playback engine. Click on "Setup", select "Playback Engine,"  go to the drop down menu and select "Pro Tools Aggregate I/O." A warning should pop up stating that "Selecting this playback engine will automatically save and close your session....". We are pretty sure we want to proceed so just click "Yes."

The session should restart. After things come back online we can set up our "Pro Tools Aggregate I/O."  That will be a post unto itself. Right now my plan is to touch on setting up a Yamaha console with a Dante network

Recording From Your Digital Console: DigiCo and MADI- Pt. 1 Configuring the Console

SD9andUBMADIThe Rig For this particular example we're going to use a DigiCo SD9, with two D-Racks, and the digital snakes. This is probably my favorite set-up. It's super easy to use, and quick.

To interface the SD9 to the computer, we're going to use a DigiCo UB MADI- MADI to USB 2.0 interface. The computer of choice will be a 2010 model 13" MacBook Pro running OS X 10.7.5 "Lion." All of the Audio will be pumped into Pro Tools 10.

Configuring the Console

On the hardware side of things, you'll need a 75 ohm video grade cable terminated with BNC connectors to connect the console's MADI output to the UB MADI.

Configuring the console has to be one of the easiest set-ups I've ever seen. We are going to copy the inputs from the D-Rack to the MADI output of the console. This taps into the input channels just after the pre-amps, before any EQ or other processing. Here are the steps:

  1. Press the "Master Screen" button on the console.
  2. Select the "Setup" tab on the top right corner of the screen.
  3. Select "Audio I/O."
  4. Find "Rack 1" on the left column of the open window and select it.
  5. Find the "Copy Audio To" button on the top right area of the open window.
  6. Select "3: MADI" in the drop down menu.

Boom! You're done! If you're using 2 D-Racks you would just repeat the process to route the 2nd rack. We can now transmit our audio to the computer. Stay tuned for Part 2, when we will install the UB MADI software and configure Pro Tools 10 to receive the incoming audio!